Installing a stair carpet yourself – step-by-step guide and tools
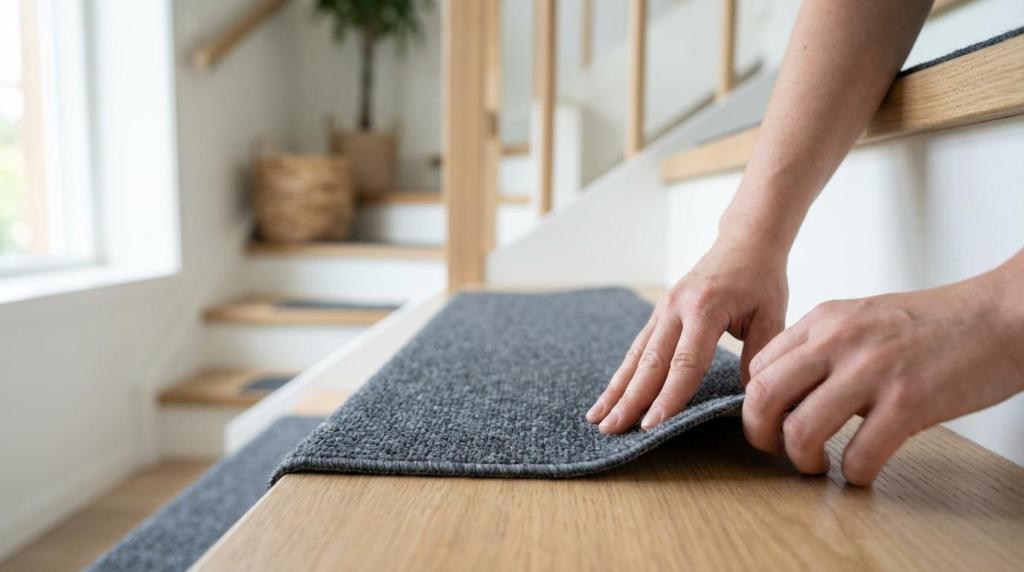
A small improvement on stairs can make a surprisingly big difference in everyday life. A stair carpet reduces the risk of slipping, dampens footstep noise and protects the tread surface from wear. When the carpets are neatly aligned and the edges firmly secured, the result looks finished without the feel of a renovation.
This guide covers how to install a stair carpet yourself, both as individual stair carpets (often self-adhesive) and as a stair runner or carpet covering the full tread. It also includes tools, measuring tips and the most common pitfalls.
Choose an installation method to suit the stairs and everyday life
The same product does not work on every staircase. On a wooden surface, a self-adhesive stair carpet is often the quickest and neatest solution. In a household where people walk in socks, pets run on the stairs or sound carries easily, a carpet makes a noticeable difference.
A stair runner or full-tread carpet solution is appropriate if you want to cover old marks more extensively or if the stairs are otherwise challenging (for example, an uneven surface). It usually requires more work and tools.
The comparison below helps you choose a direction before measuring and buying.
|
Solution |
Advantages |
Disadvantages |
Work required |
|---|---|---|---|
|
Self-adhesive stair carpets (individual) |
Quick, no nails or glue, easy to replace |
Adhesion depends on cleanliness and the surface |
Low |
|
Individual carpets + double-sided tape |
Also works on more difficult surfaces |
Tape may leave marks, installation takes time |
Low–medium |
|
Stair runner / full covering (fastened with trims, staples or glue) |
Covers extensively, creates a unified look |
Requires more tools and care |
Medium–high |
Before you start: check the stairs and surface
Good adhesion almost always begins with cleaning and the condition of the surface. On stairs, dust, grease and old adhesive residue weaken the fastening, no matter how grippy the carpet backing is.
If there is an old carpet on the stairs, remove it carefully and take out any staples or tacks. At the same time, check the fastening of the treads: squeaky boards, protruding nails and loose trims should be repaired before installing the carpets. Even a small raised area will show in the finished result and be felt underfoot.
Allow the stairs to dry thoroughly after washing. The worst enemy of a self-adhesive carpet is moisture that remains on the surface “unnoticed”.
Tools and supplies: the essentials and useful extras
You can install many stair carpets with very few tools, but a few suitable tools make the result neater and the work safer. Also keep in mind that people will be moving on the stairs during the work, so it is best to keep supplies together in one box.
- Tape measure: for measuring tread depth and width
- Utility knife + spare blades: for a neat cut without tearing
- Pencil or masking tape for marking: for making lines without permanent marks
- Vacuum cleaner and a damp microfibre cloth: for removing dust and grease before fastening
- Knee pads
- Pressure roller or clean kitchen towel for pressing: improves adhesion when you press the carpet into place
- Double-sided carpet tape (if you are not using self-adhesive carpets or need extra grip)
Measure and plan: an even line determines the look
Stair dimensions can vary surprisingly much, especially in older homes. Measure at least the width and depth of the tread at several points. If the differences are clear, plan the installation according to how the overall result looks, not according to just one tread.
A good rule of thumb for individual stair carpets is to leave the same “border” on both sides so that the line remains straight. If there is a handrail on only one side, the eye can easily be deceived and the carpets can start to “drift” sideways.
Make a small test layout: place one carpet on the tread without removing the backing paper and view it from a distance to see how the position looks.
Step-by-step installation of self-adhesive stair carpets
Once the surface is clean and dry, installing a self-adhesive stair carpet is essentially a “peel and press” job. Even so, a calm working order prevents crooked installation and air bubbles.
- Vacuum the stairs thoroughly and wipe the treads lightly with a damp cloth. Allow them to dry.
- Lightly mark the desired position: use masking tape or a pencil in places that will remain beneath the carpet.
- Place the carpet in position while the backing paper is still on and check the alignment.
- Remove only part of the backing paper first, align the carpet and lower it into place.
- Press from the centre towards the edges to remove air. Go over the edges especially carefully.
- Repeat for each tread from top to bottom so that you do not constantly have to walk over completed adhesive surfaces.
- Finally, check every carpet: the corners, front edge and any “nose” are the places where detachment usually begins.
If you order self-adhesive stair carpets, the idea in many selections (including Finnmart.eu's stair carpets) is exactly this: fastening without separate glue or nails, and, if necessary, the carpet can be removed and repositioned as long as the surface remains intact and clean.
Stair runner or full-tread carpet: what changes?
Installing a stair runner or full covering is a different job. The material is often thicker, and in order to keep it looking structured, it needs to be pulled taut and neatly secured at the edges. Many people do this with staples, trim fasteners or gripper rods, and sometimes with carpet glue.
The core of the work is the same as for self-adhesive carpets: a clean surface, accurate measurements and installation from top to bottom. The difference lies in the fastening and finishing.
If you use gripper rods or staples, decide in advance where the fastenings will go. Visible staples on stairs can be perfectly fine when the line is straight and the spacing is even. If the aim is an unobtrusive finish, the fastening is often hidden beneath the front edge of the tread and in the corners.
Thick carpet may need carpet stretching so that no loose areas remain to wrinkle over time. If you do not own stretching tools and have many stairs, this is where a professional can save you frustration. In a small space, careful manual work is often enough if you proceed patiently and redo sections when necessary.
Finishing: edges, cutting and checking
Finishing makes a stair carpet safe. If an edge is left even slightly loose, a sock, paw or shoe tip can catch on it. Always cut with a sharp blade and replace the blade in time so that the edge does not fray.
If the carpet extends over the front edge of the tread, make sure the fold is tight and pressed down firmly. With self-adhesive models, the front edge is the part worth pressing once more at the end, even if the other areas already feel secure.
Also check that the tread surface remains even: no bubbles, no wrinkles. Even a small raised area can feel surprisingly slippery when a foot hits it from the “wrong angle”.
Common problems and quick fixes
When something goes wrong, the cause is usually one of three things: the surface was not clean, the carpet was placed crookedly or the fastening is not tight enough at the edges. The issue can often be fixed without having to redo the whole staircase.
- The carpet comes loose at a corner: clean the area, press it down again and, if necessary, add a small piece of carpet tape beneath the corner
- The carpet was placed crookedly: remove it immediately and reposition it; the longer you wait, the more firmly the adhesive surface “sets”
- An air bubble in the middle: carefully lift from the edge and press down again from the centre towards the edges; use a roller or towel
- The edge frays while cutting: replace the blade, cut in one long stroke and support the carpet well
- The stairs feel uneven: sand down a small raised area or repair a loose board before continuing to the next treads
Safety during the work
Working on stairs is different from working on a floor. Keep one tread at a time as the “work area” and move tools out of the walking path. Wear shoes with grippy soles and use the handrail whenever you move on the stairs.
If you cut carpet on the stairs, preferably make the cut on a level surface downstairs or on the upper landing. Cutting on a stair tread is possible, but the risk of slipping increases when your position is narrow.
Care and everyday use: how to keep the carpet in good condition
A stair carpet collects dust and sand because stairs are a walkway. Regular vacuuming extends its service life and keeps the surface neat. If the carpet is washable, always follow the product's washing instructions and allow it to dry thoroughly before putting it back.
With self-adhesive models, it is a good practice to check every few weeks that the front edges are still firmly attached. If socks are worn often in the household or the stairs are used at speed, occasionally pressing around the edges keeps the feel firm.
If you are wondering whether to choose a set suitable for the entire staircase at once or buy a few to test, a practical option is to start with the most critical area: the steepest stairs or those where slipping has nearly occurred. Once the sizing and feel are right, it is easy to continue with the rest in the same style.
